
Start With The Job You Need The Clamp To Do
Before comparing sizes and prices, decide what the clamp will do in your workshop. A clamp for gluing timber panels is not the same as one for holding steel while drilling, and neither suits every task. In Pinetown, New Germany and Westmead we often see workshops buying one heavy clamp for everything, then struggling when a smaller reach or wider opening is needed.
Think in terms of the actual application: holding, pressing, aligning, fixing or spreading. For cabinet work you may need even pressure across a flat surface. For metalwork, you may need a firmer grip and a frame that does not flex. For quick jobs on site, speed matters too. If you work in humid coastal areas like Durban North or Umhlanga, choose clamps that can be wiped down easily and stored dry after use.
- List the top 5 jobs the clamp will handle
- Check the material being clamped: wood, steel, plastic or mixed materials
- Measure the widest opening you need, then add a small margin
- Decide if you need one-handed use or longer tightening time
Read Clamp Reach, Opening And Throat Depth Properly
Clamp reach describes how far the clamp jaw can extend from the frame to the workpiece edge. Opening is the maximum width the clamp can grip. Throat depth is the distance from the bar or frame to the centre of the jaw, and it matters more than many buyers realise. If the throat depth is too short, the clamp may never reach the fixing point even when the opening looks suitable.
For example, a clamp may open wide enough for a 600 mm panel, but if the throat depth is only 80 mm it will not sit correctly on a deep edge. That becomes a problem on gates, box sections and larger timber assemblies. Take a tape measure to the bench and check the real component sizes, not just the overall product length.
- Opening: how wide the jaws can spread
- Reach: how far the clamp can grip into the workpiece
- Throat depth: how deep the clamp can sit from the edge
- Bar length: useful for long panels and frame work
Choose The Right Pressure For The Material
More pressure is not always better. Light pressure is enough for many woodworking tasks, while metalwork and fabrication usually need firmer clamping force. Excess pressure can mark soft timber, bow thin panels, or crush delicate edges. In repair shops and maintenance teams, the best clamp is often the one that holds steadily without leaving damage.
If you work with soft wood, painted surfaces or plastic parts, look for clamps with protective pads or soft jaws. For rougher jobs, a stronger screw action or ratchet style may suit better. Pressure should feel controllable, not sudden. You want the work held square and stable, not forced out of alignment. That saves rework and keeps joints cleaner, especially when time is tight during load-shedding breaks.
- Soft wood and finished surfaces: use lower, controlled pressure
- General assembly: medium pressure with wide pads
- Metal fabrication: firmer grip with a strong frame
- Delicate components: use jaw protectors or spreader blocks
Match Frame Type To Workshop Use
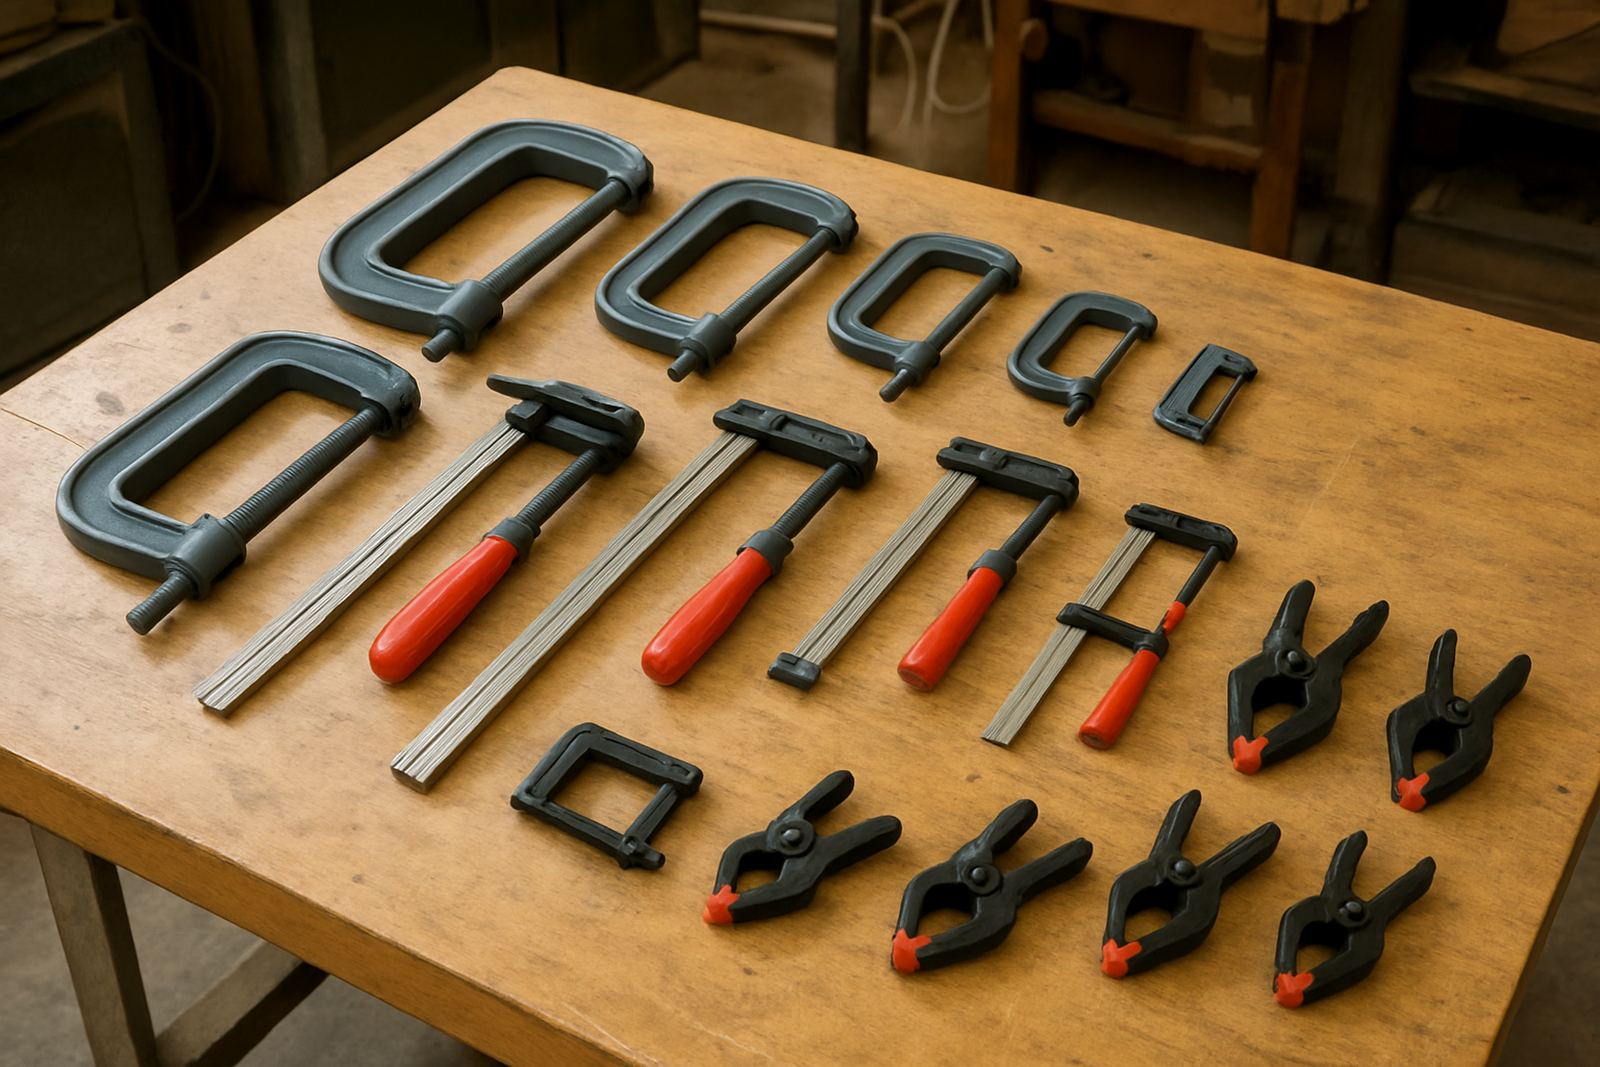
Clamp frame type affects both strength and convenience. Bar clamps are common for general workshop work and longer panels. Screw clamps give fine control and are useful where accuracy matters. Quick-action clamps save time on repetitive tasks, while heavier duty frame styles work better for fabrication and maintenance. If your workshop handles mixed jobs, it is better to stock a few different frame types than one style in every size.
Trade workshops in Durban often need clamps that can move between bench work and on-site calls. A clamp that is too bulky becomes awkward in a van, while a light clamp may not last in daily use. Check the handle grip, thread action and jaw alignment. If a clamp bites unevenly from the start, it will only get worse with wear.
- Bar clamps: good for long panels and general assembly
- Screw clamps: better for controlled tightening
- Quick-action clamps: useful for repeat jobs and fast setup
- Heavy duty frames: better for fabrication and tougher use
Build A Clamp Set For Real Workshop Tasks
A practical clamp set should cover the jobs you do most often, not every possible task. Start with a few medium sizes, then add longer reach or specialty clamps as your workload grows. If you are setting up a new workshop in Pinetown, Hillcrest or Durban North, plan for the work you expect in the first 6 to 12 months and add from there. That keeps costs in check and avoids duplicate stock.
A balanced starter set often includes a mix of short clamps for fast assembly, medium clamps for everyday repairs, and a couple of longer clamps for panels or frames. Keep one section of stock set aside for replacement because clamps do go missing on site. It happens. Mark sizes clearly and standardise where possible so staff grab the right tool without wasting time.
- 2 to 4 short clamps for small repairs and quick holds
- 2 to 4 medium clamps for everyday trade work
- 1 to 2 long clamps for panels, doors or frames
- Protective pads or jaw covers for softer materials
Check Quality Points Before You Buy
Clamp quality shows up in the details. Jaws should close squarely, threads should turn smoothly, and the frame should feel steady under pressure. If the handle digs into the hand after a few turns, it will slow the job down. On busy sites, that matters more than a fancy finish. A good clamp should be easy to clean, simple to store and dependable over repeated use.
Before buying in quantity, check for consistent sizing across the range. Mixed stock can cause frustration when one 300 mm clamp behaves differently to another. Ask whether the clamp is suitable for indoor workshop use only or for outdoor work as well. Coastal humidity and dust can shorten life if the tool is not cared for properly. A quick wipe after use and dry storage makes a big difference.
- Jaw alignment is straight and even
- Thread or trigger action feels smooth
- Grip surfaces do not slip under normal pressure
- Sizes are clearly marked for stock control
- Finish is practical for the conditions you work in
Use A Simple Buy Checklist Before You Order
If you are ordering clamps for a workshop, keep the selection process simple and practical. Start with the task, check the opening, then check the reach and frame type. After that, look at how the clamp will be stored, moved and replaced. This is especially useful when fitting out trade spaces with limited bench space or when planning courier delivery to branches across KwaZulu-Natal and beyond.
Jameson Tools supports workshops with tool kit planning, starter kit bundling, replacement matching and on-site inductions where needed. If you are standardising stock for a team, it helps to keep the clamp range tight and logical. That makes it easier for staff to choose the right tool first time and reduces wear from mismatched use.
- What task will the clamp do most often?
- What opening and reach do you actually need?
- Will the frame suit wood, metal or mixed work?
- Do you need quick action, fine control or heavier pressure?
- Can the set be standardised across the workshop?